

You don’t need an app to fix your money — a simple spreadsheet can change how you spend and save.
Templates from Excel, Google Sheets, Canva, and even influencer packs do most of the heavy lifting.
This post shows ready-to-download templates, a clear how-to for building your own, the must-use formulas, and when to choose monthly vs annual layouts.
By the end you’ll have a practical sheet you can use this week to track paychecks, spot leaks, and plan for big expenses.
Ready-to-Use Budget Spreadsheet Templates for Immediate Download

Microsoft 365 Excel templates are your fastest option if you’ve already got the software or use Excel online. Open the template library and grab household, holiday, event, or business budget spreadsheets. They’re pre-formatted with formula cells and category rows, so you can start punching in numbers right away. Some Excel templates show each month’s income side by side, which helps when your paycheck jumps around. The catch? Local editing needs a Microsoft 365 purchase, though the files sometimes open in compatible software with a few formatting hiccups.
Google Sheets gives you a completely free path with 15 GB of cloud storage baked into every Google account. Search the template gallery for “Monthly budget” and you’ll find pre-built spreadsheets that work across your phone, tablet, and computer without waiting for downloads. Annual and business budget templates are there too, and Google Sheets lets you and a partner update the same file at the same time. For first-time budgeters who get nervous around formulas, the Federal Trade Commission offers a simple PDF worksheet focused only on monthly allocations. No calculations, just a clean printable page.
Canva supplies two distinct template styles: printable PDFs that look beautiful on paper but don’t auto-calculate totals, and spreadsheet-style templates that open in Excel or Google Sheets and do support formulas. Canva’s free account gets you basic designs, while Canva Pro runs $15 per month for a wider library. Personal finance influencers and practitioners publish zero-based budgeting templates too. Some are free with an email signup, others bundle net worth calculators and tax guides into premium packs priced from $10 to $50. If you want your bank transactions to populate the spreadsheet automatically, Tiller connects to your accounts and refreshes data daily for $79 per year after a 30-day free trial.
Common template types include:
Monthly budget – tracks day-to-day spending and compares it to category limits
Annual budget – displays all 12 months in a single view for cash flow forecasting
Zero-based budget – assigns every dollar a job so income minus allocations equals zero
50/30/20 split – divides net income into 50% needs, 30% wants, and 20% savings or debt repayment
Business cash flow sheet – separates revenue, business expenses, and owner draw for freelancers or small companies
Choose a monthly template if you’re new to budgeting or want quick weekly updates. Pick an annual template if you need to plan for vacations, medical procedures, or seasonal income swings. Zero-based and 50/30/20 templates suit intermediate users who prefer a structured allocation rule, while business sheets serve anyone who mixes personal and work finances and needs clear separation.
How to Build a Custom Budget Spreadsheet from Scratch

Creating a budget spreadsheet from scratch takes 15 to 60 minutes depending on how many categories and formulas you toss in. Start by labeling Column A as “Date,” Column B as “Category,” Column C as “Description,” Column D as “Amount,” Column E as “Month,” and Column F as “Running Balance.” This layout mirrors a check register and makes it easy to sort, filter, or pivot your data later. Add a header row at the top with these labels, then freeze that row so it stays visible when you scroll down through hundreds of transactions.
Next, set up a summary section at the top or side of the sheet where you calculate total income, total expenses, and the difference between the two. Reserve one cell for net monthly income, another for the sum of all expenses, and a third that subtracts expenses from income to show your remaining balance. Label each cell clearly. “Net Income,” “Total Expenses,” “Remaining.” You never have to guess what a number represents. If you’re using Excel, consider converting your data range into an Excel Table (Insert → Table) so formulas automatically expand when you add new rows. In Google Sheets, use named ranges for the same stability.
Add category totals by creating a small reference table that lists each spending category alongside a formula that sums only the amounts in that category. For example, if “Groceries” appears multiple times in Column B, use a SUMIF formula to add up all grocery expenses without manual selection. Place this reference table in a visible spot. Many people use the top left corner or a separate “Summary” tab. You can check at a glance whether you’re over or under budget in any category. Use simple cell borders and light background colors to visually separate income, expenses, and summary calculations.
Here are the eight steps to follow:
- Open a new blank spreadsheet in Excel, Google Sheets, or another compatible tool.
- Create column headers in row 1. Date, Category, Description, Amount, Month, Running Balance, Notes.
- Freeze the top row so headers remain visible when you scroll (View → Freeze → 1 row).
- Reserve cells for key totals near the top. Net Income, Total Expenses, Remaining Balance.
- Build a category reference table listing each spending category and a corresponding SUMIF formula.
- Set up data validation in the Category column to select from a drop down list of predefined categories.
- Add conditional formatting to highlight cells that exceed budget limits or show negative balances in red.
- Insert a running balance formula in Column F that subtracts each expense from the previous balance as you go.
Beginners can skip data validation and conditional formatting at first and add those features once the basic structure feels comfortable. Seasoned users often create multiple tabs. One for raw transactions, one for monthly summaries, and one for charts. Then link them with cell references or IMPORTRANGE formulas. The goal is a layout that makes entering new transactions fast and reviewing totals even faster.
Essential Formulas Every Budget Spreadsheet Should Use

Every budget spreadsheet relies on a handful of core formulas that automate the math so you never have to pull out a calculator. The simplest and most common is SUM, which adds up a range of cells. “=SUM(D2:D30)” totals all the amounts from row 2 to row 30 in column D. Use SUM for your total income, total expenses, and any subtotals you track, and update the range as you add new rows. When you need to add only specific transactions that match a condition, SUMIF steps in. “=SUMIF(B2:B30,”Groceries”,D2:D30)” adds up every amount in column D where the corresponding category in column B says “Groceries.”
SUMIFS extends that logic to multiple conditions, which is useful when you want to sum groceries for January only. “=SUMIFS(D2:D30,B2:B30,”Groceries”,E2:E30,”Jan”)”. For category lookups or more complex cross referencing, VLOOKUP and INDEX-MATCH let you pull budget targets or prior month totals from another table. A basic example: “=VLOOKUP(“Groceries”,CategoryTable,2,FALSE)” retrieves the budgeted amount for groceries from a two column reference table where category names are in the first column and budget amounts are in the second. INDEX-MATCH offers more flexibility and works better with large datasets or tables where the lookup column isn’t the first column.
IF and IFERROR formulas add decision making to your spreadsheet. Use IF to display status messages. “=IF(F10<0,”Over Budget”,”OK”)” checks the remaining balance in cell F10 and prints “Over Budget” if it’s negative. IFERROR wraps other formulas to replace error messages with friendly text or blank cells. “=IFERROR(D10/C10,””)” attempts to divide D10 by C10 but shows nothing if C10 is zero instead of displaying a “#DIV/0!” error. To calculate the percentage of income each category consumes, divide the category total by your net income cell and format the result as a percentage. “=CategoryTotal / IncomeCell” produces values like 15% or 8%.
| Formula | Purpose |
|---|---|
| =SUM(D2:D30) | Totals all amounts in the specified range (expenses or income) |
| =SUMIF(B:B,”Groceries”,D:D) | Adds amounts only where the category column matches “Groceries” |
| =SUMIFS(D:D,B:B,”Rent”,E:E,”Jan”) | Sums amounts that meet multiple criteria (category and month) |
| =IF(Balance<0,"Over","OK") | Displays “Over” if the balance is negative, otherwise “OK” |
| =CategoryTotal / IncomeCell | Calculates the percentage of income spent in a category |
Beginners should start with SUM and SUMIF, then add IF statements once the basic totals are working reliably. Wrap formulas in IFERROR as soon as you notice error codes appearing. This keeps the spreadsheet looking clean and prevents confusion when you share it with a partner or review it weeks later.
Monthly vs Yearly Budget Spreadsheet Structures
A monthly budget spreadsheet zooms in on day to day spending and compares every transaction against a set of category limits for the current month. You enter each purchase, subscription charge, and paycheck as it happens, and running totals update automatically to show whether you’re on track or overspending. Monthly templates work best if you want tight control and regular feedback. Logging expenses every few days keeps you aware of where money goes and helps you catch billing mistakes before they snowball. This format suits anyone with steady income, weekly paychecks, or a preference for frequent budget check-ins.
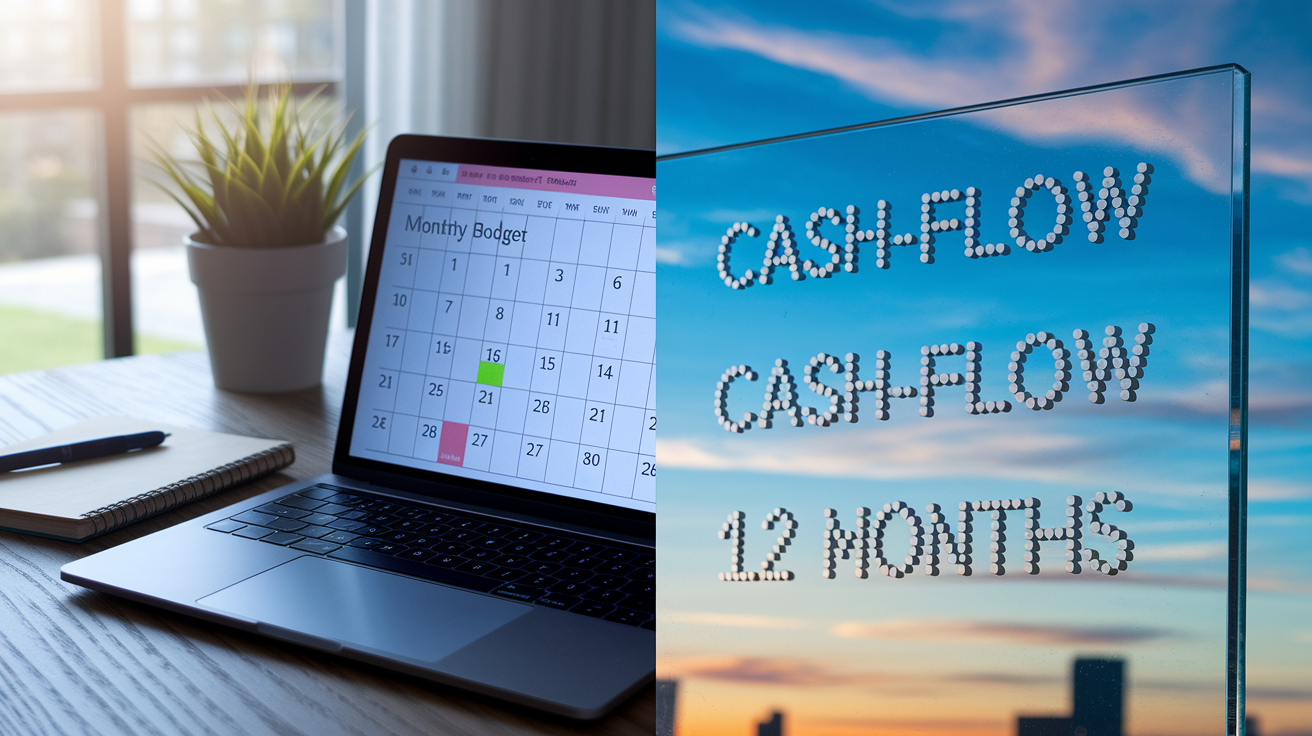
A yearly budget spreadsheet spreads 12 months across columns or separate tabs so you can see cash flow trends, plan for annual expenses, and smooth out seasonal income swings. Instead of focusing on individual transactions, yearly templates summarize each month’s income, fixed costs, variable spending, and savings contributions in a single row or consolidated section. This bird’s eye view makes it easier to forecast when you’ll need extra cash for vacations, property tax bills, or back to school shopping, and it highlights months when income dips or spikes. Freelancers and commission based earners often prefer yearly templates because they can average income across the full year and earmark surplus months to cover leaner periods.
When to use each format:
Monthly template – you want weekly or daily spending feedback, your income is stable, you prefer granular control over every category.
Yearly template – your income fluctuates, you need to plan for predictable annual events like holidays, medical procedures, or insurance renewals, you want to track long term savings progress.
Combination approach – use a monthly sheet for transaction logging and link it to a yearly summary tab that rolls up each month’s totals into a 12 month view.
Beginner recommendation – start monthly to build the tracking habit, then add a yearly overview after three to six months of consistent data.
Some users maintain both structures in separate tabs of the same spreadsheet file. The monthly tab captures every purchase and paycheck, while the yearly tab pulls summary figures from the monthly data using SUMIFS formulas filtered by month. This hybrid setup delivers both immediate feedback and long range visibility without duplicating data entry.
Budget Spreadsheet Methods: Zero-Based, 50/30/20, and More

The 50/30/20 rule divides your net monthly income into three buckets: 50% for needs, 30% for wants, and 20% for savings and debt repayment. Needs include rent or mortgage, utilities, insurance premiums, groceries, and minimum debt payments. Anything you can’t skip without serious consequences. Wants cover dining out, hobbies, streaming subscriptions, and discretionary shopping. Savings and debt repayment capture emergency fund contributions, retirement account deposits, and extra payments beyond minimums on credit cards or loans. A spreadsheet built around this rule typically includes a top summary that calculates each percentage and then lists category totals underneath to ensure actual spending aligns with the 50/30/20 split.
Zero-based budgeting takes a different approach by assigning every dollar of income a specific job so that income minus all allocations equals zero. You start with your net monthly income, then subtract category amounts one by one. Rent, groceries, car payment, savings, entertainment. Until nothing is left unassigned. This method forces intentional decisions about where money goes and eliminates the vague “leftover” pile that often disappears without a trace. Zero-based templates include a running total cell that shows how much income remains to be allocated. When it hits zero, you stop adding categories or adjust existing amounts to stay balanced.
Sinking funds add another layer by setting aside small amounts each month for predictable future expenses that don’t happen monthly. Instead of scrambling to cover holiday gifts or a summer vacation in a single paycheck, you create a line item for each goal and deposit a fraction every month. For example, if you need $1,200 for holiday shopping in December, you budget $100 per month starting in January so the full amount is ready when you need it. Sinking funds reduce financial stress, prevent credit card debt, and give you a clear picture of how much cash is truly available for day to day spending versus earmarked for upcoming events.
Common budget categories and savings strategies:
Housing – rent, mortgage, property tax, homeowners or renters insurance, HOA fees
Transportation – car payment, gas, maintenance, registration, auto insurance
Food – groceries, dining out, coffee shops, meal delivery
Debt – credit card minimum and extra payments, student loans, personal loans, medical bills
Savings – emergency fund, retirement contributions, kids’ college fund, home downpayment fund
Sinking funds – holidays and gifts, car repair fund, home renovation projects, quarterly or yearly bills, back to school shopping, vacation fund, new baby expenses, pet expenses, electronics replacement
The 50/30/20 rule works well for beginners who want a simple framework without tracking every dollar’s exact purpose. Zero-based budgeting suits anyone who prefers tight control and wants to eliminate unexplained spending. Sinking funds pair with either method and are especially valuable if you face irregular but predictable expenses throughout the year. Many spreadsheets blend all three. Apply 50/30/20 percentages to set high level targets, use zero-based logic to assign every dollar within those targets, and carve out sinking fund line items inside the savings or wants buckets.
Customizing a Budget Spreadsheet for Families, Couples, and Small Businesses

Households with kids need extra category rows for child care, school supplies, extracurricular activities, summer camps, and clothing that gets outgrown every season. Add a “kids’ expenses” section or tag certain categories with a child’s name if you want to track costs per child separately. Include sinking funds for predictable spikes like back to school shopping in August or holiday gifts in December, and dedicate a line item to irregular medical or dental expenses that insurance doesn’t fully cover. Families also benefit from a shared emergency fund that covers three to six months of household expenses, so reserve a savings category specifically for that cushion and update the target amount whenever fixed costs change.
Couples who share finances often create joint sections for rent, groceries, utilities, and shared debt payments, then add individual sections for personal discretionary spending so each person has autonomy over hobbies, clothing, or small splurges. Label one column “Joint” and another “Partner A” or “Partner B” to keep the totals clear, or use separate tabs within the same spreadsheet file and consolidate the joint categories on a summary tab. Real time collaboration tools in Google Sheets or Excel online allow both partners to enter transactions simultaneously, which reduces the risk of missed expenses and ensures everyone sees the same up to date numbers. Set a recurring budget meeting, weekly or monthly, where you review totals together, discuss any category overages, and adjust allocations as needed.
Small businesses and freelancers need to separate business revenue from personal draw and track gross income alongside net income after estimated taxes. Add columns for invoice status, payment terms, and accounts receivable aging so you know which clients owe money and when payments are due. Business expense categories might include software subscriptions, marketing costs, contractor payments, office supplies, and professional development, while personal categories cover household bills and personal savings. Set aside 25 to 30% of gross income in a separate tax category if you’re self-employed and responsible for quarterly estimated payments, and update that percentage whenever your effective tax rate changes. A small business spreadsheet also benefits from a rolling 12 month cash flow projection that shows when lean months are coming and how much buffer you need to cover fixed costs during slow periods.
Automating Your Budget Spreadsheet with CSV Imports and Bank Integration

Most banks and credit card companies let you export transactions as CSV files, which you can then import into Excel or Google Sheets without retyping every purchase. Download the CSV, open it in your spreadsheet program, and map the columns. Date, Description, Amount. To match your budget layout. Once imported, you can copy and paste the rows into your main transaction tab or use a dedicated import tab that feeds data to your summary calculations. This method saves hours of manual entry and reduces typos, though you still need to assign categories to each transaction since bank exports rarely include budget-friendly labels.
Google Sheets offers a built-in function called IMPORTRANGE that pulls data from one spreadsheet into another, which is useful if you maintain separate files for checking, savings, and credit cards but want a consolidated view. The formula looks like “=IMPORTRANGE(“spreadsheet-URL”,”SheetName!A1:D100″)” and updates automatically whenever the source file changes. You can stack multiple IMPORTRANGE calls in a single consolidation tab to see all accounts in one place, then use SUMIFS to calculate category totals across every source. This approach keeps raw transaction data isolated while giving you a unified dashboard for analysis and decision making.
For hands-off automation, third-party services connect directly to your bank and update your spreadsheet daily. Tiller is the most commonly recommended tool for privacy-focused users who want bank integration without sharing login credentials with a budgeting app. Tiller costs $79 per year after a 30-day free trial and supports both Excel and Google Sheets, pushing new transactions into a dedicated tab each morning. You still categorize transactions manually or with custom rules, but the data entry itself is automatic. Other automation paths include Google Apps Script for Sheets users who know a bit of JavaScript, or Excel VBA macros for advanced users who want custom workflows.
Five automation methods to consider:
Manual CSV import – download bank files monthly and paste them into your transaction tab, low cost, moderate time investment.
IMPORTRANGE consolidation – link multiple Google Sheets files for a unified view, free, requires setup but no ongoing cost.
Tiller daily sync – connects bank accounts and updates spreadsheets automatically, $79 per year, best for hands-off tracking.
Google Apps Script – write custom code to fetch data from APIs or automate category assignment, free if you can script, steep learning curve.
Excel Power Query – import and transform CSV files with repeatable steps, built into Excel, ideal for users who download statements regularly.
Automation saves time and improves accuracy, but it also introduces privacy considerations. Only connect your bank to services you trust, review permissions carefully, and consider sticking with manual CSV imports if you prefer to keep login credentials completely offline. Even partial automation, such as importing transactions weekly instead of daily, can cut your workload in half while maintaining full control over data security.
Visual Dashboards and Charts for Your Budget Spreadsheet

A monthly spending pie chart shows at a glance how your money divides across categories, making it immediately obvious if one area consumes a disproportionate share. Create the chart by selecting your category totals and inserting a pie chart from the Insert menu, then label each slice with the category name and percentage. Use distinct colors for needs, wants, and savings so you can quickly assess whether your actual spending aligns with your 50/30/20 targets or other allocation rules. Place the chart near your summary section or on a separate dashboard tab so you see it every time you open the file.
A 12 month net cash flow line chart tracks the difference between income and expenses across the year, revealing seasonal patterns and months when you tend to overspend or underspend. Plot each month on the horizontal axis and the net amount (income minus expenses) on the vertical axis, then add a horizontal reference line at zero to mark the break-even point. Months above the line indicate surplus, months below indicate deficit. This visual makes it easier to plan sinking fund contributions or adjust spending in advance of predictable dips, such as holiday shopping in November and December or property tax bills in the spring.
Savings goal progress bars provide motivational feedback by showing how close you are to targets like a fully funded emergency fund, a vacation fund, or a home downpayment. Create a simple bar chart or use conditional formatting to color code a cell based on the percentage complete. Green when you’re on track, yellow when progress is slow, red when contributions have stalled. Display both the dollar amount saved and the percentage of the goal reached so you have concrete numbers and a visual cue. Update the chart monthly after you allocate new contributions, and celebrate milestones when you cross 25%, 50%, or 75% of the target.
Debt payoff charts plot your outstanding balance over time and project the payoff date based on your current payment schedule. Use a line chart with months on the horizontal axis and remaining balance on the vertical axis, then add a trendline to show the expected path to zero. If you make extra payments, the line drops faster. If you miss a payment or add new charges, the line flattens or rises. This chart turns an abstract goal (“pay off the credit card”) into a visible trajectory that reinforces progress and highlights setbacks before they derail your plan.
Budget Spreadsheet Maintenance: Weekly, Monthly, Quarterly, and Yearly Tasks

Weekly tracking keeps your budget current and helps you catch problems before they compound. Log every purchase, paycheck, and automatic payment as soon as it clears your account. Many people choose a specific day, like Friday afternoon, to batch-enter the week’s transactions so it becomes a predictable routine. While you’re entering amounts, scan for double charges, unexpected subscription price increases, or transactions you don’t recognize. Banks occasionally process the same charge twice, and subscription services raise prices without prominent notice, so a quick weekly review protects you from paying more than you should.
Monthly updates focus on adjusting income and category totals to reflect reality. If your paycheck varies due to overtime, commissions, or tips, update your net income cell with the actual amount earned that month. Compare each category’s spending to its budget, then reallocate any surplus to other categories that ran over or move it into savings. Verify that debt payments posted correctly and note the new balance on each loan or credit card so you can track payoff progress. Monthly maintenance also includes reconciling your spreadsheet totals against bank and credit card statements to ensure nothing was missed or miscategorized.
Quarterly reviews (every three months) zoom out to analyze spending patterns and plan for upcoming events. Look for trends across the past 90 days: which categories consistently exceed their budget, which ones have room to spare, and whether your overall cash flow is positive or negative. Cancel or downgrade subscriptions you no longer use, and mark your calendar for predictable expenses in the next quarter such as vacations, school registration fees, or medical appointments. Revisit your debt repayment and savings timelines to see if extra windfalls or reduced spending allow you to accelerate goals, or if setbacks require a temporary adjustment.
Yearly budget resets ensure your spreadsheet reflects current life circumstances and financial priorities. At the start of each year or on your financial anniversary, review major life changes. Moves, new jobs, promotions, new children, marriage, divorce. Adjust category amounts accordingly. Check for changes in insurance premiums, employer benefits, and tax withholding that affect your net income. Reassess your emergency fund target (three to six months of expenses) and compare it to the actual balance in savings, then set a plan to close any gap. Review total debt balances and interest rates to confirm your payoff strategy is still optimal, and consider creating new sinking funds for recurring annual expenses like property taxes, car registration, or holiday shopping.
Key maintenance tasks by frequency:
Weekly – log all spending including cash transactions, check for duplicate charges or unexpected price increases.
Monthly – update net income if it varies, adjust category budgets based on actual spending, verify debt payments and note new balances, reconcile spreadsheet totals with bank statements.
Quarterly – analyze 90 day spending trends, cancel unused subscriptions or downgrade services, plan for upcoming events and seasonal expenses, review debt repayment and savings timelines.
Yearly – reset categories to match current life circumstances, account for insurance, benefits, and tax changes, reassess emergency fund target and compare to actual savings, review total debt and interest rates, create sinking funds for recurring annual costs.
After major life events – immediately update income and expense categories when you move, change jobs, have a baby, get married, or experience other significant changes.
Before large purchases – run a scenario in your spreadsheet to see how a new car payment, home renovation, or vacation affects monthly cash flow.
When budget stress increases – revisit your allocations and look for categories that need a raise or areas where you can temporarily cut back.
At tax time – use your spreadsheet data to confirm deductions, estimated tax payments, and year-end income totals.
Consistent maintenance turns a budget spreadsheet from a static document into a living tool that adapts to your financial reality and keeps you informed without constant manual effort. The weekly habit builds awareness, the monthly check-in corrects course, the quarterly review spots trends, and the yearly reset aligns your budget with your evolving life and goals.
Final Words
Grab a ready-to-use budget spreadsheet or build one from scratch—either way, you’ve got templates (Excel, Google Sheets, PDFs), step-by-step setup, and the essential formulas to track every dollar.
Choose monthly or yearly layouts, pick a method like zero-based or 50/30/20, and customize for families, couples, or small businesses. Add automation, dashboards, and simple maintenance routines to keep the numbers accurate and useful.
This guide gave the downloads, how-to steps, and upkeep checklist so you can act now. A clear budget spreadsheet makes planning easier—start today and feel steadier by next month.
FAQ
Q: What is the 50/30/30 budget rule?
A: The 50/30/20 budget rule is a simple split of after-tax income: 50% for needs, 30% for wants, and 20% for savings or debt—useful for quick budgeting and building emergency savings.
Q: Is there a budget spreadsheet in Excel?
A: A budget spreadsheet in Excel is available through Microsoft 365 templates—household, holiday, event, and business—so you can download, open in Excel, and customize formulas and categories right away.
Q: Is there a free budgeting spreadsheet?
A: A free budgeting spreadsheet is available—Google Sheets and Microsoft offer free templates, and the FTC provides a beginner PDF worksheet; many printable Canva templates are free to download and use.
Q: How to create your own budgeting spreadsheet?
A: To create your own budgeting spreadsheet, set columns like Date, Category, Description, Amount, Month, and Running Balance; freeze headers, add SUM and SUMIF formulas, and expect 15–60 minutes to build a usable template.